
The war has begun in earnest! The weekend of April 5-6 marked the beginning of our Combined Arms campaign as we got three games to the tabletop. Strap in for an exciting kick off as we chart both the wider campaign moves and discuss the battles themselves, with a narrative spin of course.
At the bottom, I’ll address some of the hurdles and lessons learned as we dove ever deeper into this crazy adventure.
An Invasion Launched
April 05, 1944. In the pacific, US Marines occupy Utirik Atoll in the Marshall Islands. In the East, the Soviet Union pushes into Odessa in Ukraine, and in England, the largest invasion force ever mustered prepares to launch a full scale invasion of France.

Arrayed along the coast, three combined armies of British, Canadian, and US soldiers clamber aboard stuffed transports. Endless sorties of bombers fly overhead, and out to sea the US Navy and the Royal Navy poise themselves to deliver their precious cargo the short but dangerous leap across the channel.
A Daring Sortie
On the mainland, The Axis forces are aware that the invasion is imminent, having gathered key intel in the preceding months. With the initiative firmly in hand, Axis High Command greenlights a daring, almost suicidal mission. The Kriegsmarine will sortie with whatever might remains, to challenge the channel crossing. They reason that they will be hard pressed to turn the might of the Allied Armies aside once they’ve landed, so in a break with tradition, all power is given to the Kriegsmarine for their hour of destiny.
Allied air power is quick to see German ships setting out into the channel. Their reports are almost ignored, there must be some mistake, Allied command can barely believe the folly of it. But no, A cruiser squadron, supported by dozens of S boats, is making all speed to intercept the invasion.

Air wings are scrambled, and the damage is substantial on the advancing fleet, but it is not enough to sway their steely determination. The situation is now critical. Soon the Cruisers will be in range to rain fire down on the helpless transports carrying Second and Third Armies southwards.
A US squadron led by USS Indianapolis charges out to intercept the advancing ships. But in the dark of the night, Several S-Boats manage to approach the transports unmolested. Only close supporting Steam Torpedo Boats stand between hunter and hunted.
A Simple Ferry Ride
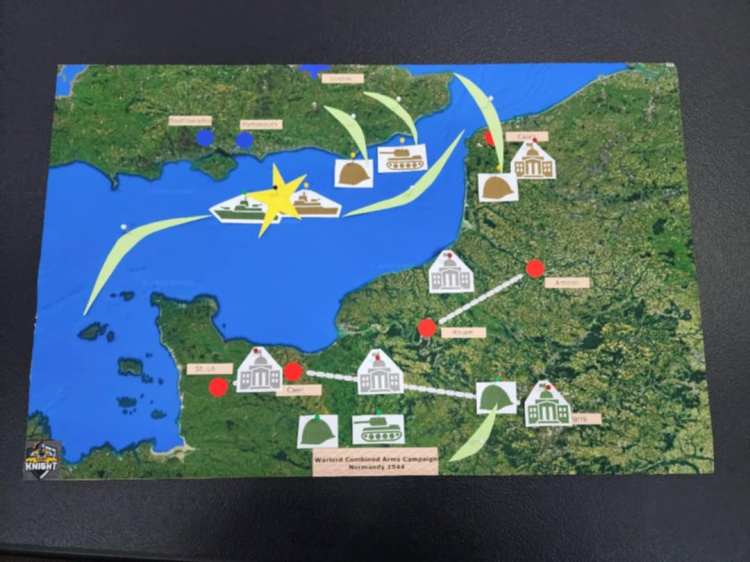
Elsewhere, First Army managed to cross the channel at its closest point, landing against the defended beaches surrounding Calais. German intelligence, while successful in predicting the invasion, were mistakenly under the belief that Allied Forces would be landing primarily in Normandy. They had reinforced as far west as Cherborg in fact! Instead, a swift strike at Calais saw the allies achieve their toehold, and secure the first objective of the campaign, a communications array just north of Amiens.

Reacting to this landing, Axis armies moved to fortify Paris before advancing further north. They would stop the Allies at Amiens, they reasoned. Other forces, responding to the alarm in the early morning, began moving north towards the beaches, prepared to meet the Allies wherever else they may land.
The Battle of the English Channel
The action in the Channel was sharp. The Kriegsmarine’s cruiser squadron, led by the Admiral Hipper, had aimed to distract Allied surface and air forces while their S-Boats went in for the kill in the early morning gloom.

The German Cruisers were surprised to see no less than 6 American Fletcher Class Destroyers emerge from the fog. Knowing the damage these lightning vessels were capable of inflicting, the cruisers began a defensive shift, aiming to keep distance where possible and committing their destroyers a trio of Type 1936-A to engage their counterparts.
At one end of the line, Allied cruisers managed to position themselves to cross the Kriegsmarine’s T, inflicting heavy damage. Elsewhere, the defensive strategy paid off, with a Type 1936-A breaking through the Fletchers to deliver a killing blow to USS Chicago.

In retaliation, the Admiral Hipper and Blucher were sent to the bottom of the channel by Allied torpedoes, Blucher’s smoking corpse taking its time falling below the waves. Konigsberg and Koln managed to slink away, heavily damaged, but the US fleet was similarly bruised.

Closer to the transports, German S-Boats engaged in brutal close quarters action with British STBs struggling to defend an isolated transport. Fighting often closed to within small arms range as both sides pulled no punches. In the chaos, the transport captain, choosing ferocity, charged towards the attacking ships, hoping to dodge incoming torpedoes.
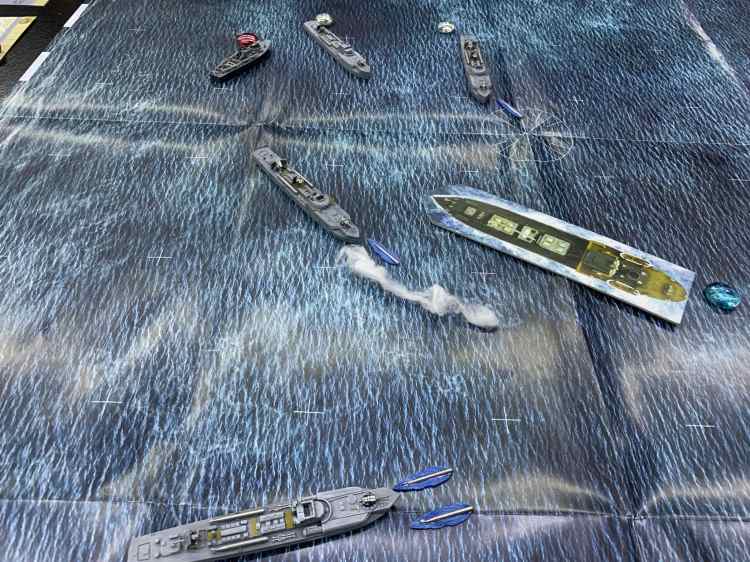
His luck held until the fourth and final torpedo struck true. Crippled, and with his stalwart defenders burning or stricken in the frigid channel waters, he attempted one last maneuver to escape.
Against all odds, a burning S-Boat, its crew as broken as their vessel, managed a parting shot with their 20mm gun that forced the transport under the waves.

It was a bloody affair, but the Allies had managed to turn away the Kriegsmarine Cruiser Squadron and save the vast majority of their invasion fleet.
Victory: Allies (Allies: 02 Wins/ Axis: 01 Win)
After Action Report (Game Master Commentary)
So this post is a little late in coming, as I had intended to do one to announce the launch of the campaign, but turns out when you launch a campaign, you need to do some campaigning.
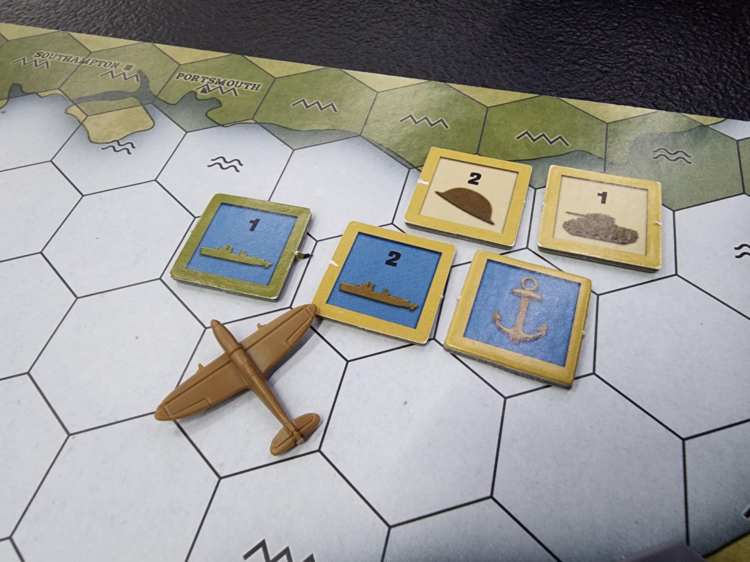
While I had a packed weekend March 29-30, Tristan and I had managed to squeeze the first turn of the Combined Arms boardgame in and queue up the first engagement. We played this first turn following the rules of the game exactly, but swiftly came to the realization that we were going to have to handle air battles and battle resolution a little differently if we were going to bring the community in as we had planned.
While the rules of Combined Arms work if two players are both playing the game and the associated battles, it’s a little different if you want to begin engagements as normal, resolve them all “simultaniously” during the week at the club, and then work through the resolutions before starting the next turn.
Specifically, air battles need to be resolved before land and sea battles, and the resolution of air battles may open up sea and ground forces to air strikes. Normally this has the potential to remove units from the map. Since we want all battles to matter and we don’t want to resolve things in a particular order, we opted for the following rules change:
Alternative Battle Resolution: All battles are resolved simultaneously. Rather than destroying units based on the rules in Combined Arms, instead defeated forces are forced back. Victorious units may then attempt to destroy units that fell back using the normal chart. If aircraft won their air battle, they remain, and therefore they can also roll to destroy the defeated armies.
This gives victorious units with a victorious (or unopposed) airforce two attempts to destroy an army or navy. AA fire if successful will mutually ‘kill’ the air force rather than remove its opportunity entirely.
The point is to not invalidate any community member’s participation.

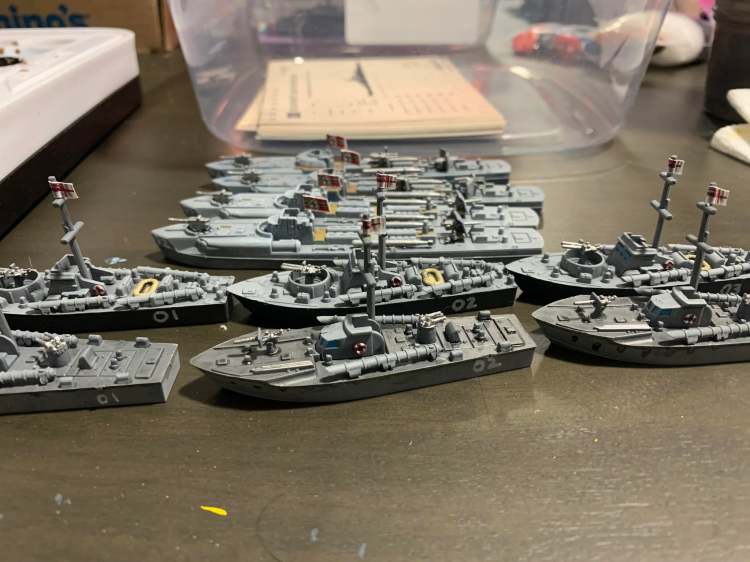
So back to it. Now that we knew we had a naval battle queued up, I had to confront the fact that I hadn’t finished my cruel seas or Victory at Sea fleets. We want anyone who wants to play to have access to my forces to dip their toes, and I wasn’t about to let anyone play with bare resin/plastic/pewter!
It may not be perfect, but I managed to get paint on 28 ships and boats throughout the week to be ready for the games that people asked for on the weekend of the 5th-6th. I’ll be returning to them to add more detail and clean them up, but they’re perfectly playable, and that’s the key.
I also wanted to shout out our wonderful community who have jumped with both feet into this campaign. We had 8 individuals come out, or attempt to come out for this first week of games. That meant three games were played to resolve the Battle of the English Channel, and I couldn’t be happier. Thanks to everyone who is keeping up, chatting in the Facebook Chat, and putting together/cleaning up their own forces.
Tomorrow, we’ll be resolving turn 2, and we’ll see what rapid fire painting awaits me after that!
